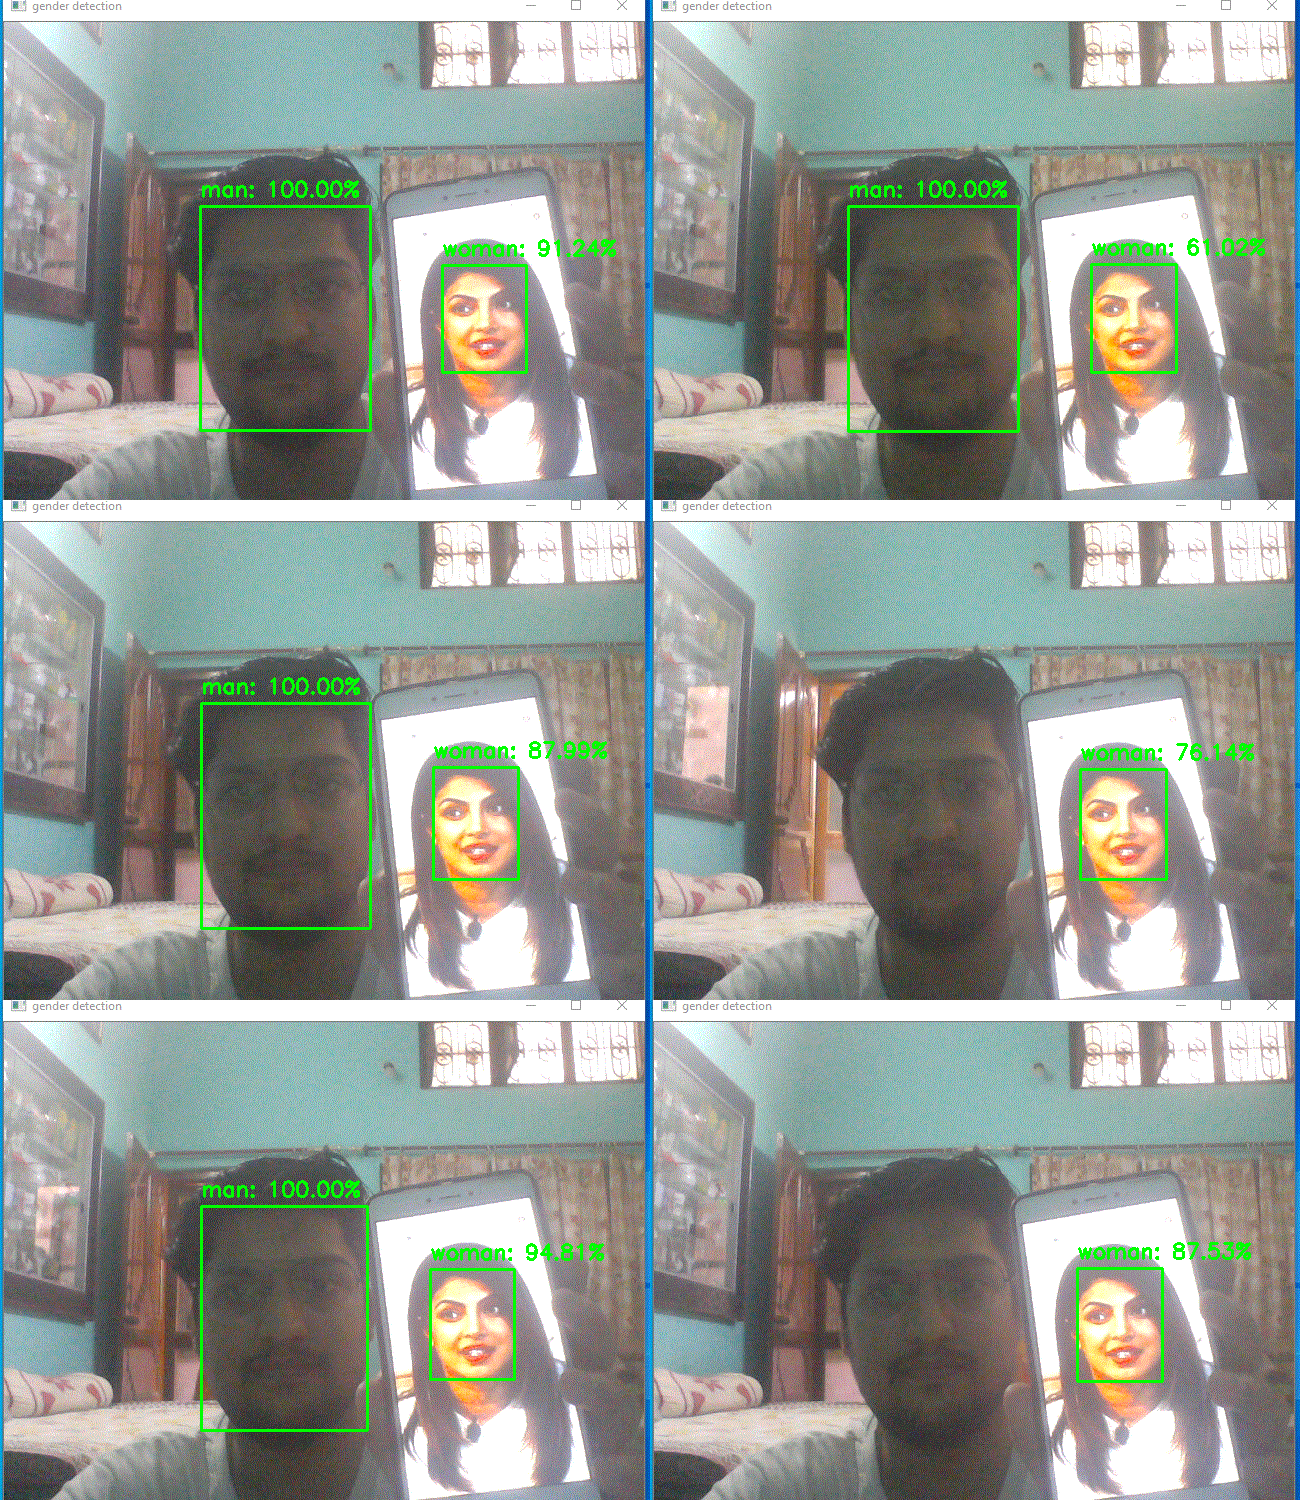
Gender Detection on real time video streaming
Gender Detection on real time video streaming
Here, we will learn how to build a Gender Detector model using Keras, Tensorflow, and Open CV. We will also see how to apply this on a Live Video Camera.
So lets get started!!!
Step 1) Data Collection:
First and foremost we need to collect the data to train our model. I have taken the data images from Kaggle and google images. You can add some other additional images as well to your dataset. You can download the Kaggle dataset from here [https://www.kaggle.com/gmlmrinalini/genderdetectionface].
Step 2) Data Preprocessing:
Here we will be creating one train.py file where we will pre-process our data and will convert all the images into array.
We will create 2 list — one with the image data in the form of array and second to store the labels for that corresponding image.
i) Importing the necessary libraries:
from tensorflow.keras.preprocessing.image import ImageDataGenerator
from tensorflow.keras.optimizers import Adam
from tensorflow.keras.preprocessing.image import img_to_array
from tensorflow.keras.utils import to_categorical, plot_model
from tensorflow.keras.models import Sequential
from tensorflow.keras.layers import BatchNormalization, Conv2D, MaxPooling2D, Activation, Flatten, Dropout, Dense
from tensorflow.keras import backend as K
from sklearn.model_selection import train_test_split
import matplotlib.pyplot as plt
import numpy as np
import random
import cv2
import os
import glob
ii) initial parameters:
epochs = 100
lr = 1e-3
batch_size = 64
img_dims = (96,96,3)
data = []
labels = []
iii) Now we are loading the dataset images and shuffling the same to train our model in a better way and to get more accurate results:
image_files = [f for f in glob.glob(r’C:\Files\gender_dataset_face’ + “/**/*”, recursive=True) if not os.path.isdir(f)]
random.shuffle(image_files)
iv) Here we are converting images to arrays and labeling the categories and then converting those to the ndarray to pass as an input to our model:

v) Now, we will split our dataset into training and testing part and converting them to the categorical data.

vi) Now we will use the ImageDataGenerator to train our model with more number of images , by rotating them , shifting left and right…

Step 3) Data Modelling and Training:
Now we will create a function separately to build the model using Keras CNN to train it with our input images.

i) Building the model using above buildModel function:
model = buildModel(width=img_dims[0], height=img_dims[1], depth=img_dims[2],
classes=2)
Now we will compile our model with “Adam optimizer” which will change our learning rate after each epoch it performs to get the more accuracy:
opt = Adam(lr=lr, decay=lr/epochs)
model.compile(loss=”binary_crossentropy”, optimizer=opt, metrics=[“accuracy”])
- ii) Now, we will train our model and will save the same for later usage while testing:

iii) Now , we will plot and see the training and testing accuracy and loss analysis in the form of graphs using matplotlib:


Step 4) Applying the Model in the Camera:
i) Initializing all the required libraries and loading our model which e have created in above steps:
from tensorflow.keras.preprocessing.image import img_to_array
from tensorflow.keras.models import load_model
import numpy as np
import cv2
import os
import cvlib as cv
#load model
model = load_model(‘gender_detection.model’)
ii) Open webcam and declare both the output classes:
webcam = cv2.VideoCapture(0)
classes = [‘man’,’woman’]
iii) Now , We are looping through the frames getting captured by camera, reading frames from camera and then applying the face detection technique to detect the faces.
After that we will loop through all those detected frames, will crop them, will draw a rectangle over detected faces and then at the end will be applying our model we have created on it to detect the gender of that particular person.

iv) Now we are showing the final image frame captured above with rectangle and predicted class label on it and once we press “Q” from out keyboard the camera window will get closed:
cv2.imshow(“gender detection”, frame)
if cv2.waitKey(1) & 0xFF == ord(‘q’):
break
v) Releasing all the resources now:
webcam.release()
cv2.destroyAllWindows()
We are done now!!!.
For the entire code please checkout my GitHub.
Glimpse of the Gender detection model on live camera:

Thank you! and Happy Coding!!.


Comments
Post a Comment